Well, we have committed to it, a Maker Faire or Mini- Maker Faire. I'm not really sure what to call it but the plan is to host a Making type faire on April 18th, 2015 between the hours of 9 and 1 or 2 pm depending on the level of excitement. We have reserved the site at our school and have begun to get the word out via email to our local list-serve. Next it's time to publish it in our weekly email blast.
The list serve has been amazing and within a day I had lots of help and suggestions. I have contacted UCI, OC stem as well as a local new making club that might be helpful. Tentatively I plan on setting up about 3 tables per project and each project will fit within a zone that might be defined by age appropriate use or the devices used, for example Little bits, or 3D printing.
I now need to put together the layout for the gym where it will be held. I measured it along with the basic 30"x6' table and will use CAD to define the layout, number of tables and zones. I have some ideas but will need to strategize with others to help find the best layout and flow.
Wednesday, January 7, 2015

Wednesday, April 16, 2014
Maker Space and Elective
Suddenly the elective is over and I didn't blog nearly enough about it. The L shaped room has slowly started to transform more into a maker space one one leg and computer space on the other. The maker space look and ideas came entirely from a Maker meeting at The St. Matthew's Parish School. Lead by John Umekubo, teachers from the LA area and south gathered to learn and collaborate and of course MAKE.


The elective began with the Arduino's and the idea was generally to work on programming them and seeing what we could do with the LCD's, LED, motors, transistors etc. that we received with the kits that we purchased. About half way through the class a few students asked if they could make an airplane and place the arduino controlled motor in it. Well several iterations later we decided to use the 3D printer to print boat and propellers - the making had begun. The video below tells the story - I can't explain how excited I was to see all these things happen!
The elective began with the Arduino's and the idea was generally to work on programming them and seeing what we could do with the LCD's, LED, motors, transistors etc. that we received with the kits that we purchased. About half way through the class a few students asked if they could make an airplane and place the arduino controlled motor in it. Well several iterations later we decided to use the 3D printer to print boat and propellers - the making had begun. The video below tells the story - I can't explain how excited I was to see all these things happen!
Wednesday, March 5, 2014
Technology Elective
There are some days where it just seems that everything falls into place. I have 15 students in the tech elective this term which is a dramatic increase over the typical 5 or less. I only have 8 Arduino kits, 3 Raspberry Pi kits and 18 computers. I thought that it might be best if I had students choose what they wanted to work on. I figured that the Pi's are too hard to set up and I didn't think I could manage them along with the Arduinos so I told the students they could choose Arduino or Codeacademy. Fortunately exactly 8 wanted to work on the Arduinos and the rest chose Codeacademy.
I wanted to do a better job teaching the students about the circuits than I did last term. I spent one period explaining how to connect to the breadboard and about short circuits which was a bit dry but it did the trick. The next few days they tinkered using the links I gave them on the Google doc. I decided that the next class I would force them to choose a project and direction.
This is the point of todays Blog. They chose a project (either solo or in a team) and moved forward. They were far more focused and each person had a goal. I guess this seems obvious but it just worked out better that I expected. One group decided that they would make an air powered car/boat using the arduino to control motor speed and print the propeller with the 3D printer. Awesome, except the printer needs to be fixed - oh well that will happen soon. The group of 3 quickly set out using cardboard, tape , scissors and some other random items I happened to have in a box that I think the art department was throwing away. The creativity was amazing and I have to think that I was beginning to figure out what a maker space might look like. We will see how things turn out but it is a good start. Below are a few pictures of the work.


I wanted to do a better job teaching the students about the circuits than I did last term. I spent one period explaining how to connect to the breadboard and about short circuits which was a bit dry but it did the trick. The next few days they tinkered using the links I gave them on the Google doc. I decided that the next class I would force them to choose a project and direction.
This is the point of todays Blog. They chose a project (either solo or in a team) and moved forward. They were far more focused and each person had a goal. I guess this seems obvious but it just worked out better that I expected. One group decided that they would make an air powered car/boat using the arduino to control motor speed and print the propeller with the 3D printer. Awesome, except the printer needs to be fixed - oh well that will happen soon. The group of 3 quickly set out using cardboard, tape , scissors and some other random items I happened to have in a box that I think the art department was throwing away. The creativity was amazing and I have to think that I was beginning to figure out what a maker space might look like. We will see how things turn out but it is a good start. Below are a few pictures of the work.
Wednesday, February 5, 2014
The Bridge Project
The Bridge Project is the brainchild of our Head of School Dr. Dan Greenwood. It is an amazing STEAM project incorporating 3D design, modeling, engineering and scientific process. The students are challenged to design a bridge using Sketchup, print it on the 3D printer, weigh it, then we will test it to see how much weight it can hold.
 We put together the Google Doc for the project (you can find it here) and built several bridges for testing. We decided that the students needed something to start with so we made the basic "road" that they are to build the bridge on and included all needed information in the Google Doc. Dr. Greenwood 3D printed his bridge and we weighed and testing its strength. This was done at an assembly where we projected the test onto the screen so that the students could see it. The students loved the destructive test! We found that the bridge could support 43 pounds. The challenge is open to the entire school with no deadline. There will be a reigning champion posted and as soon as someone creates a stronger bridge that person will be the champion.

This challenge has certainly sparked the interest of many of the students. I have had 5th graders in the lab working on Sketchup during their lung recess every day for the last week. One of the difficulties is that the students don't really know sketchup that well yet and building and printing a bridge requires slightly more familiarity with Sketchup.
The first students came to me excitedly proclaiming that they "for sure" had the best bridge and asked whether I could print it right away! We pulled up their design and found that they had lines representing the wires (like the Golden Gate Bridge) and a plane above to hold the wires. It lead to the dimension discussion and I explained that it would not print. They were not happy with this discovery but I encouraged them not to give up. Further I showed them a few basic principles with Sketchup and directed them to the videos to learn. They keep coming back and working on their bridge and are getting closer to something build-able. I am hoping that Sketchup does not become too much of a constraint and am looking for some alternatives.
In the meantime - the kids are excited and so am I.
This challenge has certainly sparked the interest of many of the students. I have had 5th graders in the lab working on Sketchup during their lung recess every day for the last week. One of the difficulties is that the students don't really know sketchup that well yet and building and printing a bridge requires slightly more familiarity with Sketchup.
The first students came to me excitedly proclaiming that they "for sure" had the best bridge and asked whether I could print it right away! We pulled up their design and found that they had lines representing the wires (like the Golden Gate Bridge) and a plane above to hold the wires. It lead to the dimension discussion and I explained that it would not print. They were not happy with this discovery but I encouraged them not to give up. Further I showed them a few basic principles with Sketchup and directed them to the videos to learn. They keep coming back and working on their bridge and are getting closer to something build-able. I am hoping that Sketchup does not become too much of a constraint and am looking for some alternatives.
In the meantime - the kids are excited and so am I.
Wednesday, January 29, 2014
Scratch and Grading Projects
I just realized that once in a while I am actually able to create something that takes less time to do than if I did it by paper. Normally I spend 5 hours making something easier that would normally take 1 hour by hand. The hope is of course that I am able to use it again or teach others to use it.
Recently I spent a few weeks working with the students on Scratch (the programming tool/language). Their project was to design, make and test a game using Scratch (The assignment is here). While they were allowed to design any game I decided to introduce them to Pong and Space Invaders - two classics. The students just loved it and some spent significant amounts of time outside the classroom working on the projects.
I am just now grading them and because I went through a few iterations of the process I though it might be interesting to share.
Students turn in their Scratch game by sharing it in a Scratch "Studio" that I create -here's how
Recently I spent a few weeks working with the students on Scratch (the programming tool/language). Their project was to design, make and test a game using Scratch (The assignment is here). While they were allowed to design any game I decided to introduce them to Pong and Space Invaders - two classics. The students just loved it and some spent significant amounts of time outside the classroom working on the projects.
I am just now grading them and because I went through a few iterations of the process I though it might be interesting to share.
Students turn in their Scratch game by sharing it in a Scratch "Studio" that I create -here's how
- The students set up a scratch account either with their parents or on their own -
- I set up a scratch account for me
- I create Scratch "Studios", one for each class - in my case 7X, 7Y, 7Z
- I then check the box marked "allow anyone to add projects" and copy the URL
- The students log into their scratch account
- I share the URL through our website which they click on. Scratch recognizes that they are logged in and allows them to upload their game to my studio
Grading - Using Google form
- I create a google survey as a rubric for the grading.
- I another window I log into my Scratch account and, well, play the games (I never thought my job would involve playing video games!)
- For each student I fill out the survey as I play his/her game
The spreadsheet then add up the scores and I enter them into my grading program.
Here is a screenshot

Thursday, January 23, 2014
Arduino
I was pleased with the success of the Raspberry Pi elective and thought that the Arduino might be another device that would engage the students. I had not worked with one before and was slightly concerned that I would only be a day or two ahead of the students. I decided to move forward with the program anyway.
I ordered eight of them as well as 8 kits to support their use. Pictured below are the two pieces
 I placed each kit in a container so that the small parts would not be lost. As with the Raspberry Pi I also created a Google document to share with the students so that they could get started. The setup was much different than the Pi in that the Pi itself was a computer and once setup could be programmed with Python, a language the students already knew. The Arduino is controlled by the computer and requires the Arduino software to be loaded on the computer before use. Once the software has been downloaded you need to connect the Arduino via USB and define the port to use. That done you can write the program once you learn how to program in the language.

I ordered eight of them as well as 8 kits to support their use. Pictured below are the two pieces
Tuesday, January 14, 2014
Scratch
Scratch - For the last couple of weeks the 7th grade students have been learning to program in Scratch. This is a wonderful tool developed to ease the entry into the world of programming (http://scratch.mit.edu/). While we are using it in the 7th grade it can easily be used in the lower grades as well.
The goal was to create a simple video game - I explained that they could make any game they would like but started the instruction by working with them to create the classic game of Pong. It has been one of those times when I know it has just worked for the kids. Many of them have stayed after class to finish or worked at home to solve a problem. Once most had the basics down I introduced another classic "Space Invaders". At this point the assignment was to create a game (I had a few rules to follow) and test it. Once they had completed the game I created a Scratch studio so that they could share them. Once shared they all could play each others games. It was at this point that I mentioned to them that they were playing video games in class BUT ALSO they had created them themselves. How amazing!
Some of the games are located here
http://scratch.mit.edu/studios/320911/
http://scratch.mit.edu/studios/304327/
http://scratch.mit.edu/studios/323279/


The goal was to create a simple video game - I explained that they could make any game they would like but started the instruction by working with them to create the classic game of Pong. It has been one of those times when I know it has just worked for the kids. Many of them have stayed after class to finish or worked at home to solve a problem. Once most had the basics down I introduced another classic "Space Invaders". At this point the assignment was to create a game (I had a few rules to follow) and test it. Once they had completed the game I created a Scratch studio so that they could share them. Once shared they all could play each others games. It was at this point that I mentioned to them that they were playing video games in class BUT ALSO they had created them themselves. How amazing!
http://scratch.mit.edu/studios/320911/
http://scratch.mit.edu/studios/304327/
http://scratch.mit.edu/studios/323279/


Wednesday, January 8, 2014
More about 3D
School is back in session and the one thing that almost everyone is coming by to look at are the 3D printers. There have been a myriad of questions


- How does it print?
- Where is the plastic coming from?
- What are you going to use it for?
All of the questions and comments have been positive but I have found the most intersting one to be "What are you going to use it for?" or "What will you print with it?" Hmm - I had the same question when we were first approached. As you think through it the question becomes "What can you not use it for?" As things come up during the day we begin to realize that a solution would be to design our own part for it. An example is the Raspberry Pi - we have been working on powering LED's and controlling them with it but now we can Print our own small houses, parts, letters and create holes to hold the LED's to make them light up. We can add parts to our LEGO robotics designs, we can build anything!
So now on the third day back at school I already have students who come in and say that they have downloaded something from Sketchup Warehouse and would like to print it. We are accommodating this for now because we want to make mistakes and have some things print well and others not. This is happening. Below is a picture of a Star Wars fighter that was downloaded from the Sketchup warehouse - it did not print properly. As we have already found with our own simple designs there seems to be a problem with the faces and unless there are all facing the right way the model will not print properly.
Lessons learned -
- It takes a long time to print - 4 hours + for many things
- It is difficult to remove the objects from the blue taped platen - we bought some plastic putty knives and they are doing the trick. We have to remove the platen then kind of chisel it.
- The platen needs to be leveled after several removals
The printers are amazing and have been in use at least 8 hours a day for the last 3 days.
Friday, January 3, 2014
3D Printers 2
We have been tinkering with the printers and software for a couple of days and although we still do not have kids on campus (December Holiday Vacation) we have made a few discoveries. I'm sure there will be many more to come
Sketchup -

Sketchup -
- You need to download a .stl exporter - this is the right language for the MakerBot software to print. This exporter is found in the "extensions warehouse" within the sketchup program. Note that I found that I had to sign in to download the extension.
- Once you create something in sketchup (and believe me anything I have made in very simple) I found that if I selected it all and "grouped" it that worked well before I exported.
- Faces and facing the right direction - this has been tricky and has been the subject of some inline discussions. When we thought everything looked perfect and exported it to .stl then into the MakerWare software it looked great. When we printed it look much different than the model. What we found is that the "faces" of the objects created in Sketchup were not facing the right way. If when you look at the structure in either Sketchup of Makerware, you find that one of them is dark (and it seem logical that it should be light color) then it needs to be turned around. This is better described in this blog - http://www.makerbot.com/blog/2011/07/22/google-sketchup-design-tip-fix-flipped-faces/
The MakerBot 2 Printer
- Printing from the computer - When we first printed using the MakerWare from the computer, the computer tried to logout (network setup in school) and paused the printing and we could not resume it. We solved this by unbinding the computer from the network and now it does not disconnect or sleep. The OTHER solution was to "Make" to the supplied SD card and then plug it back into the printer.
- Sticking to the blue tape - The first object was fairly easy to remove but since then we have had trouble getting the objects off the tape. We have not arrived at a solution yet but are working on one.
3D Printers
Wow! We were fortunate enough to receive a donation of 2-3D makerbot printers. We decided on the Makerbot 2 instead of the 2x after finding that the 2X was reported to be slightly more finicky. We chose to purchase them at the Microsoft Store so that in the event of issues we might have some local support.
We started off carefully, even going so far as to watch the youTube video of how to unpack your Makerbot - not sure that was necessary but it was a new toy and we certainly didn't want to damage it. The setup was straightforward and we found the setup video helpful.
Included with the machine was an SD card with pre-loaded things to make. This gives one the instant gratification of being able to make something right away - we selected the comb. Amazing! We could not believe the accuracy of the machine. It did take some time and after the first minute of watching the printer we decided to go through a few steps required for us to be able to design and print from the computer (Apple mac).
We first found that we needed the makerware software. This software is a kind of translator/scaler/viewer and the last step required to talk to the 3D printer. We decided to use Sketchup to create our models. This proved to be slightly more complicated than we had thought but more on that later. Below are a couple of pictures of the printers.
 |
| Two New MakerBot 2's |
We started off carefully, even going so far as to watch the youTube video of how to unpack your Makerbot - not sure that was necessary but it was a new toy and we certainly didn't want to damage it. The setup was straightforward and we found the setup video helpful.
Included with the machine was an SD card with pre-loaded things to make. This gives one the instant gratification of being able to make something right away - we selected the comb. Amazing! We could not believe the accuracy of the machine. It did take some time and after the first minute of watching the printer we decided to go through a few steps required for us to be able to design and print from the computer (Apple mac).
We first found that we needed the makerware software. This software is a kind of translator/scaler/viewer and the last step required to talk to the 3D printer. We decided to use Sketchup to create our models. This proved to be slightly more complicated than we had thought but more on that later. Below are a couple of pictures of the printers.
 |
| The Initial Leveling Porcess |
 |
| Made Our First Letter |
 |
| Head of School Showing First Project |
 |
| Downloaded file |
Friday, December 13, 2013
Connected Classroom - Google
Yesterday I went to the New York Hall of Science to watch a few chemistry experiments. I didn't actually go but rather I sat at my computer and watched as a live demonstration was given via the Connected Classroom. Yet another tool that Google has designed to help teachers and of later take over the world :). This is the first of many of these trips I hope to take and which I also hope to share with all the incredible teachers we have here at Harbor Day School.


Thursday, December 12, 2013
Electrical issues
The students have really done a good job connecting the relays to the various LEDs via the breadboard. We are now working to connect some LED lights that I ordered online. The first mistake was ordering plug in LEDs that require 110V AC power. I decided that ordering the nice battery powered lights was the best idea. Unfortunately most of the lights have a controller with 3 or 4 wires which allows them to blink in various patterns. We have spent 2 full class periods finding out how to get the lights to turn on using the relays and power supplies. We found that one of the LED strips needs 25 volts to operate and because it has 3 wires we had to find out how to get the various sections to light as a function of the wires that were powered.
We finally have some lights working with regularity and are now going to program them. The kids are doing well but I think it's time to define some tasks and set some goals - enough tinkering.

We finally have some lights working with regularity and are now going to program them. The kids are doing well but I think it's time to define some tasks and set some goals - enough tinkering.

Friday, December 6, 2013
Grit
As we work to have students learn about perseverance our school has made an effort to have students not give up easily when they do not understand something. The programming and assembly required for this Raspberry Pi project certainly makes student work. An example is the student who work tirelessly to get his LED blinking. He had little trouble setting up the Raspberry Pi, loading the OS and connecting the peripherals but when it came to connecting the LED it was not as easy (this was true for everyone).
There are essentially two components to this connection. 1) you need to write a Python program to control the GPIO ports on the Pi and 2) you need to properly connect the GPIO pins to the breadboard and LED.

There are essentially two components to this connection. 1) you need to write a Python program to control the GPIO ports on the Pi and 2) you need to properly connect the GPIO pins to the breadboard and LED.
He entered the program into the Python shell and connected the Pi to the breadboard. When he ran the program nothing happened - no blinking just lighting. He reviewed the program, he watched the video on how to connect it, he asked me for help and I suggested that the rewrite the program. Still, it did not work. We looked at the connections and it looked correct - well it wasn't. It took three class periods to figure it out but he was successful. I was impressed by his effort and he was excited about his success. It seems obvious that problems like this and the other typical programming problems allow for repeated failure followed by success thereby demonstrating that sometimes you have to work hard, fail, repeat -- to succeed.
Wednesday, November 13, 2013
The LED's start
It is basically the 4th day and all of them have their LED connected to the breadboard and working. They are using Python to control the GPIO and should soon be able to write and modify the simple programs provided in the videos to better control the lights.
I have to say that the Youtube instruction is amazing - they were able to get to this point quickly. The next step is to have each student create a project goal. I will give them a day or so to play around then they have to come up with a project that they plan on making. As mentioned in another post they can work on the lighting program but they will still need to document it on their project plan.


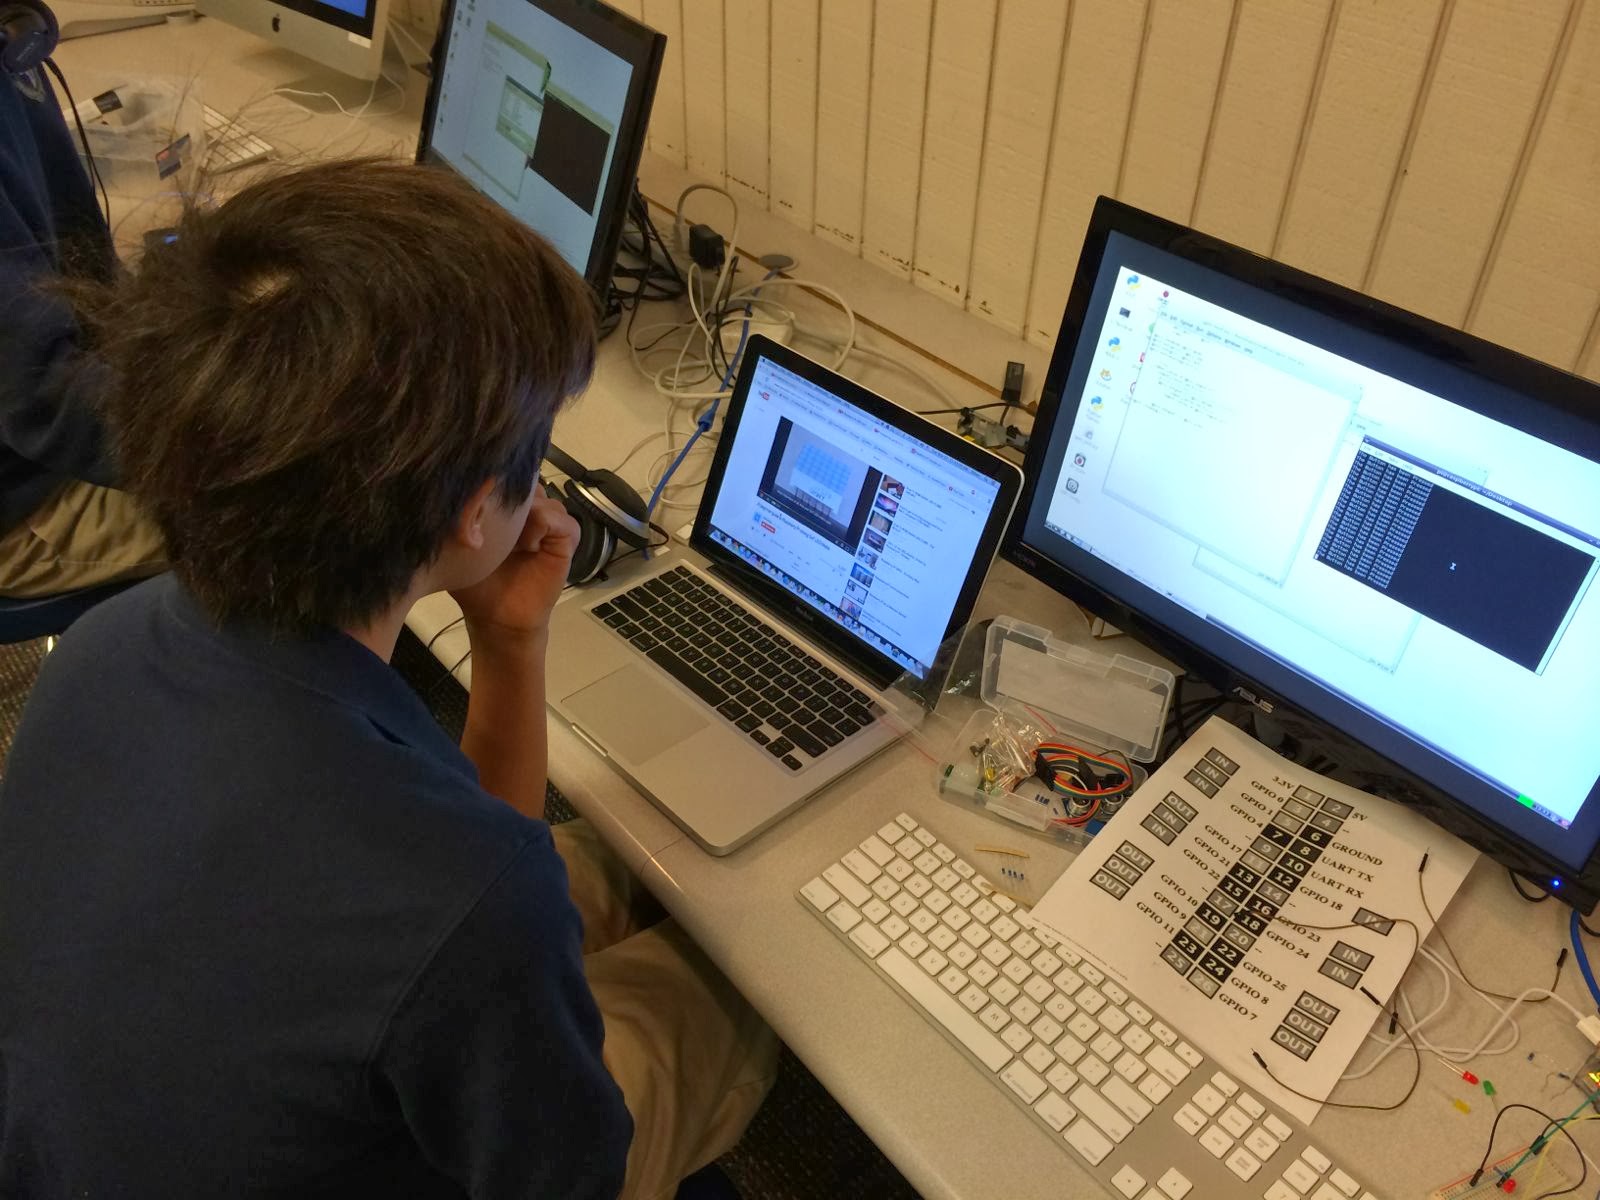

I have to say that the Youtube instruction is amazing - they were able to get to this point quickly. The next step is to have each student create a project goal. I will give them a day or so to play around then they have to come up with a project that they plan on making. As mentioned in another post they can work on the lighting program but they will still need to document it on their project plan.
Wednesday, November 6, 2013
Raspberry Pi - Day 1
THE PLAN - Give the kids the parts, share an editable google doc with some suggestions to get started and let them go.
THE GOALS
Well the first step was to learn how to properly spell raspberry - DONE
I have been playing around with the Raspberry Pi for the last few months and decided that I should have an elective that would include Python programming and the "maker" idea of assembling and using a Raspberry Pi - ($40+ computer). Aside from all the wonderful 21st century teaching and STEAM initiatives, it's just a great thing and I enjoy this kind of tinkering.
I ordered the following and made a little kit (so the $45 turns into a little more like $200+)

THE GOALS
- Use the Raspberry Pi to control some holiday lights that I will place in the lab
- Use it to work a 7 segment LED to produce numbers
- Learn
- Have fun
Well the first step was to learn how to properly spell raspberry - DONE
I have been playing around with the Raspberry Pi for the last few months and decided that I should have an elective that would include Python programming and the "maker" idea of assembling and using a Raspberry Pi - ($40+ computer). Aside from all the wonderful 21st century teaching and STEAM initiatives, it's just a great thing and I enjoy this kind of tinkering.
I ordered the following and made a little kit (so the $45 turns into a little more like $200+)
I placed the kit into a box and gave one to each of the 3 students who chose to take the elective.
 |
| Basic kit |
 |
| The Pi Kit as it came ($60) |
They received the parts, unpacked and started putting things together!
 |
| Unpacking the monitors |
 |
| Placing OS on SD card |
Day 1 complete
Subscribe to:
Posts (Atom)