
Friday, December 13, 2013
Connected Classroom - Google
Yesterday I went to the New York Hall of Science to watch a few chemistry experiments. I didn't actually go but rather I sat at my computer and watched as a live demonstration was given via the Connected Classroom. Yet another tool that Google has designed to help teachers and of later take over the world :). This is the first of many of these trips I hope to take and which I also hope to share with all the incredible teachers we have here at Harbor Day School.

Thursday, December 12, 2013
Electrical issues
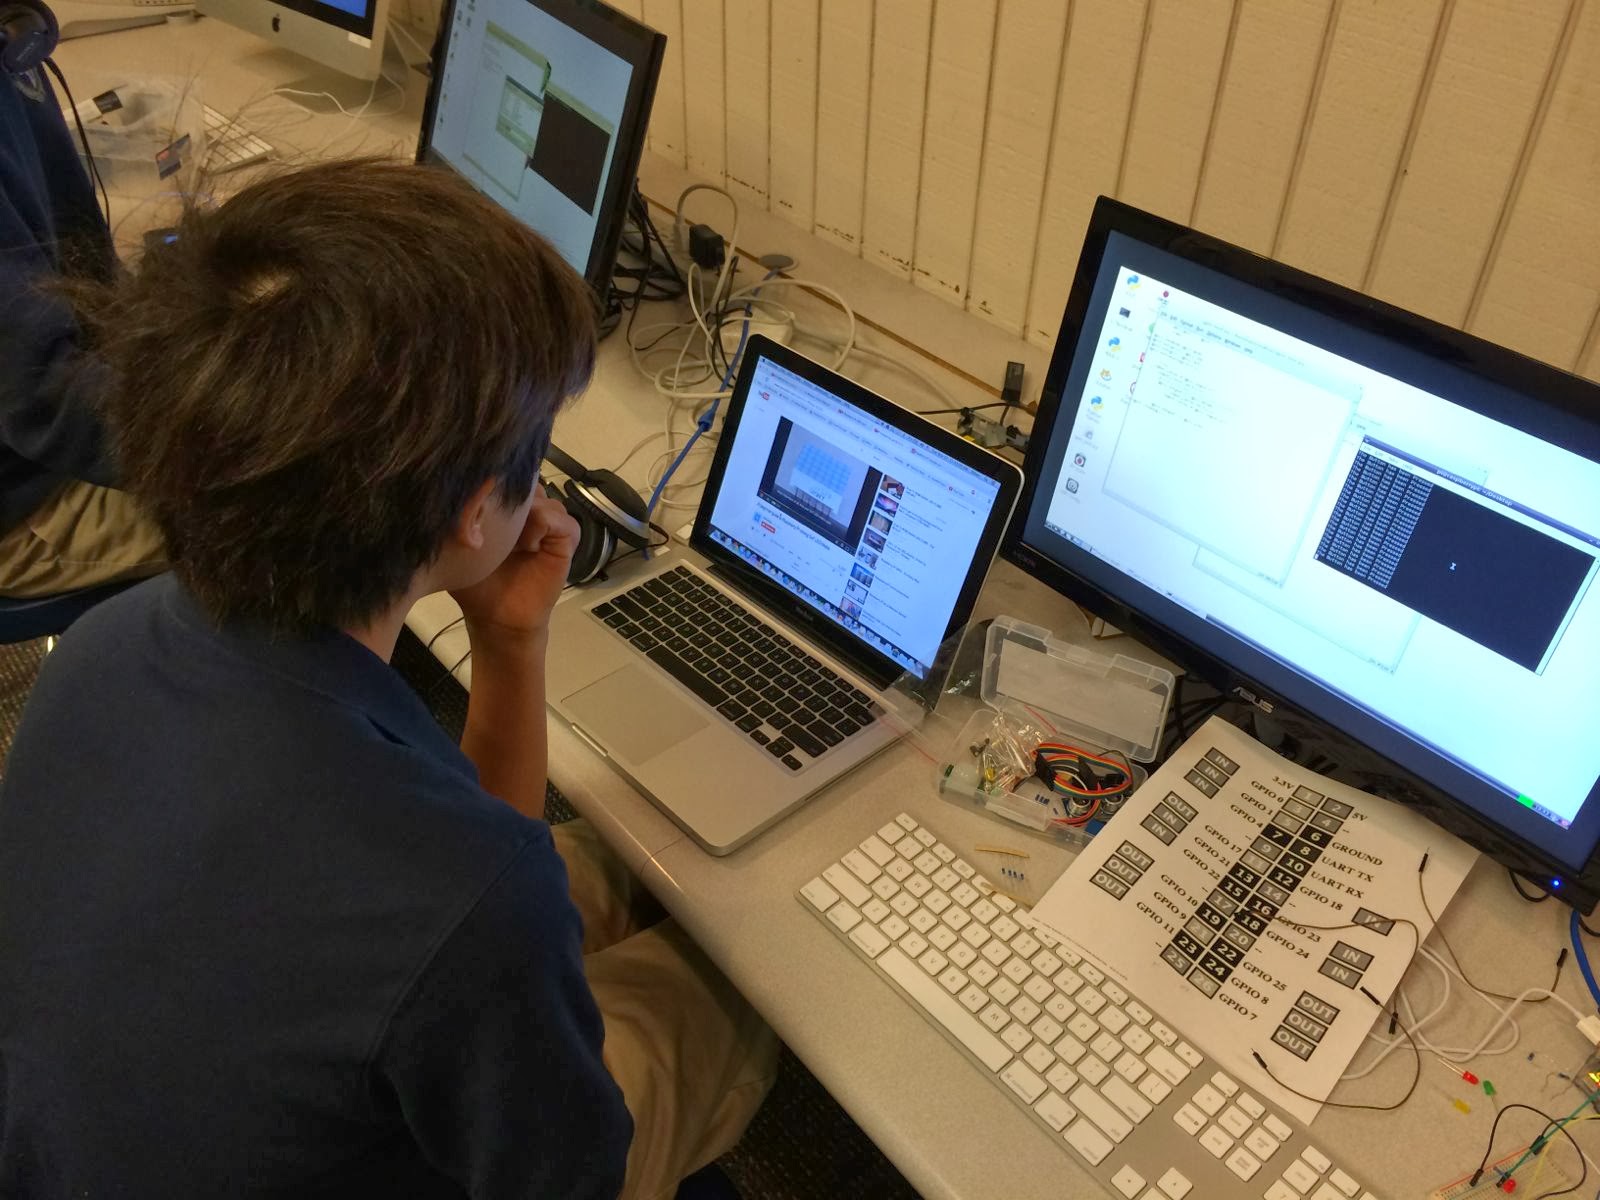
The students have really done a good job connecting the relays to the various LEDs via the breadboard. We are now working to connect some LED lights that I ordered online. The first mistake was ordering plug in LEDs that require 110V AC power. I decided that ordering the nice battery powered lights was the best idea. Unfortunately most of the lights have a controller with 3 or 4 wires which allows them to blink in various patterns. We have spent 2 full class periods finding out how to get the lights to turn on using the relays and power supplies. We found that one of the LED strips needs 25 volts to operate and because it has 3 wires we had to find out how to get the various sections to light as a function of the wires that were powered.
We finally have some lights working with regularity and are now going to program them. The kids are doing well but I think it's time to define some tasks and set some goals - enough tinkering.

We finally have some lights working with regularity and are now going to program them. The kids are doing well but I think it's time to define some tasks and set some goals - enough tinkering.

Friday, December 6, 2013
Grit
As we work to have students learn about perseverance our school has made an effort to have students not give up easily when they do not understand something. The programming and assembly required for this Raspberry Pi project certainly makes student work. An example is the student who work tirelessly to get his LED blinking. He had little trouble setting up the Raspberry Pi, loading the OS and connecting the peripherals but when it came to connecting the LED it was not as easy (this was true for everyone).
There are essentially two components to this connection. 1) you need to write a Python program to control the GPIO ports on the Pi and 2) you need to properly connect the GPIO pins to the breadboard and LED.

There are essentially two components to this connection. 1) you need to write a Python program to control the GPIO ports on the Pi and 2) you need to properly connect the GPIO pins to the breadboard and LED.
He entered the program into the Python shell and connected the Pi to the breadboard. When he ran the program nothing happened - no blinking just lighting. He reviewed the program, he watched the video on how to connect it, he asked me for help and I suggested that the rewrite the program. Still, it did not work. We looked at the connections and it looked correct - well it wasn't. It took three class periods to figure it out but he was successful. I was impressed by his effort and he was excited about his success. It seems obvious that problems like this and the other typical programming problems allow for repeated failure followed by success thereby demonstrating that sometimes you have to work hard, fail, repeat -- to succeed.
Wednesday, November 13, 2013
The LED's start
It is basically the 4th day and all of them have their LED connected to the breadboard and working. They are using Python to control the GPIO and should soon be able to write and modify the simple programs provided in the videos to better control the lights.
I have to say that the Youtube instruction is amazing - they were able to get to this point quickly. The next step is to have each student create a project goal. I will give them a day or so to play around then they have to come up with a project that they plan on making. As mentioned in another post they can work on the lighting program but they will still need to document it on their project plan.


I have to say that the Youtube instruction is amazing - they were able to get to this point quickly. The next step is to have each student create a project goal. I will give them a day or so to play around then they have to come up with a project that they plan on making. As mentioned in another post they can work on the lighting program but they will still need to document it on their project plan.
Wednesday, November 6, 2013
Raspberry Pi - Day 1
THE PLAN - Give the kids the parts, share an editable google doc with some suggestions to get started and let them go.
THE GOALS
Well the first step was to learn how to properly spell raspberry - DONE
I have been playing around with the Raspberry Pi for the last few months and decided that I should have an elective that would include Python programming and the "maker" idea of assembling and using a Raspberry Pi - ($40+ computer). Aside from all the wonderful 21st century teaching and STEAM initiatives, it's just a great thing and I enjoy this kind of tinkering.
I ordered the following and made a little kit (so the $45 turns into a little more like $200+)

THE GOALS
- Use the Raspberry Pi to control some holiday lights that I will place in the lab
- Use it to work a 7 segment LED to produce numbers
- Learn
- Have fun
Well the first step was to learn how to properly spell raspberry - DONE
I have been playing around with the Raspberry Pi for the last few months and decided that I should have an elective that would include Python programming and the "maker" idea of assembling and using a Raspberry Pi - ($40+ computer). Aside from all the wonderful 21st century teaching and STEAM initiatives, it's just a great thing and I enjoy this kind of tinkering.
I ordered the following and made a little kit (so the $45 turns into a little more like $200+)
I placed the kit into a box and gave one to each of the 3 students who chose to take the elective.
 |
| Basic kit |
 |
| The Pi Kit as it came ($60) |
They received the parts, unpacked and started putting things together!
 |
| Unpacking the monitors |
 |
| Placing OS on SD card |
Day 1 complete
Subscribe to:
Posts (Atom)